6 Simple Ways to Setup Google Tag Manager
You’ve spent countless days planning your goals, designing landing pages, setting up and tracking all the metrics you need before the launch of your new campaign.
The campaign is launched, but you realize nothing is working out as you expected. Tags weren’t installed correctly and all the metrics you wanted are just wrong.
This scenario is faced by most of the digital marketers.
Are you also facing difficulty in installing tracking codes correctly on your website?
Do you have the fear of your web developer placing the tracking codes incorrectly?
In this situations, it is impossible to know how your marketing campaigns are performing and you end up losing a bunch of high-quality prospects.
Fortunately, Google Tag Manager is the tailor-made solution for you.
Look
Here’s what you need to know about The Google Tag Manager
Google Tag Manager is a handy tool which helps digital marketers reduce the need to reach out to the developers to add/modify/remove tracking codes on your website.
Google Tag Manager is a free tool that helps marketers to implement tracking codes on a site in a few clicks to track the metrics you need.
The Tag manager simplifies the process by allowing you install any code to your site, be it from conversion tracking to remarketing in just a few clicks.
GTM aimed to solve all code installing problems with
- Templates for easy tag implementation
- Asynchronous tag loading to keep your site load times fast.
Here are some of the basic terminologies of Tag Manager –
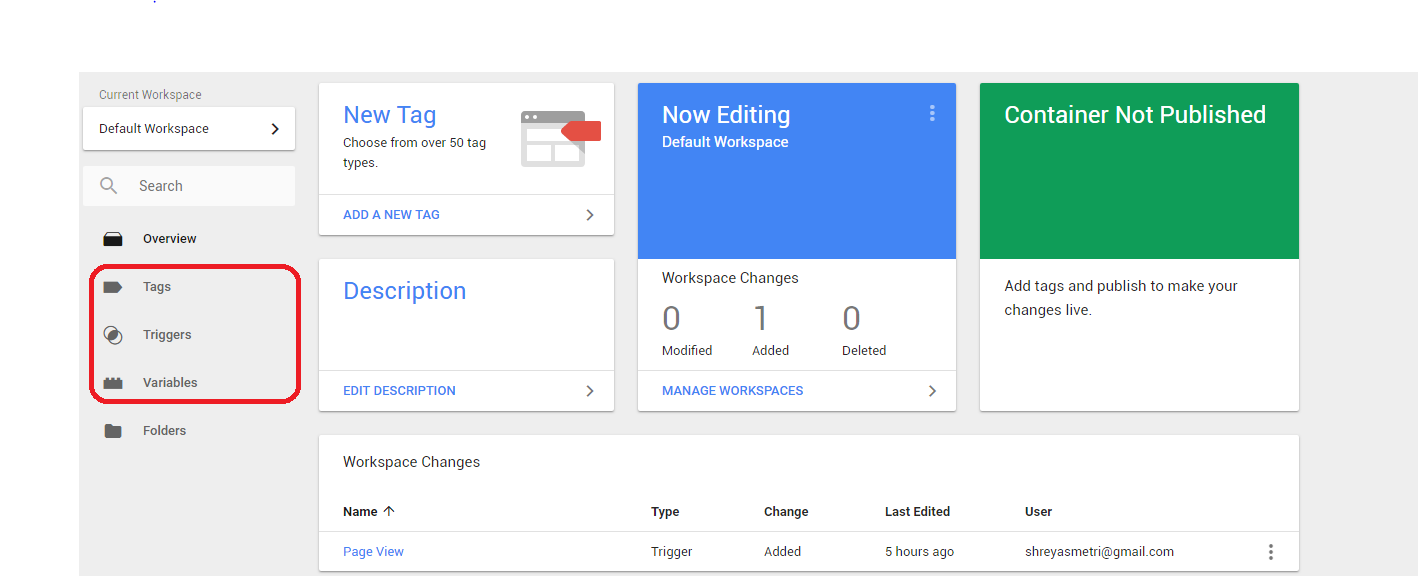
- A Container – Is a snippet which is a small piece of Javascript and non-Javascript code that should be pasted on your website.
- The Tag – A piece of code, like an Adwords Remarketing script which gets added to the page through the container.
- Trigger – This lets you decide what and where the code should be executed. For example: If you want to track the conversions only for the landing page, you can trigger a page view for that particular landing page.
- Variables – Additional modifiers used to receive or store data from tags.
GTM has a clear interface and added support for most of the tags that digital marketers commonly use.

Here are some of the benefits of using this interface
- Fast Deployment Of Tracking Codes.
- All Tags are Controlled In One Place.
- Reusable Container Tags.
- Security.
Now that you’ve got an idea about Google Tag Manager, here’s how you need to set up the tag manager on your website.
It is as simple as that you can setup your Google Tag Manager in just a few clicks which lets you track all the necessary metrics you want.
First and Foremost head to Google Tag Manager site
-
Create An Account
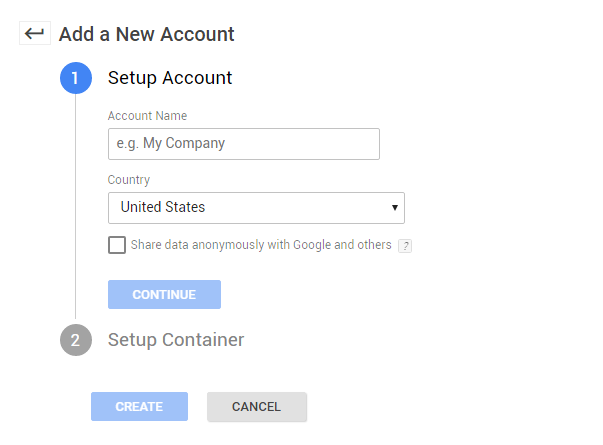 Name your Account once you’ve logged in, this will be helpful if you handle more than one account.
Once you enter the URL of your website it prompts to set up the Container ID. Select the type of container and click the “create” button.
 This gives you the Google Tag Manager Code.
Install this code on your website only once and this lets you install ‘N’ number of tracking codes in just a few clicks.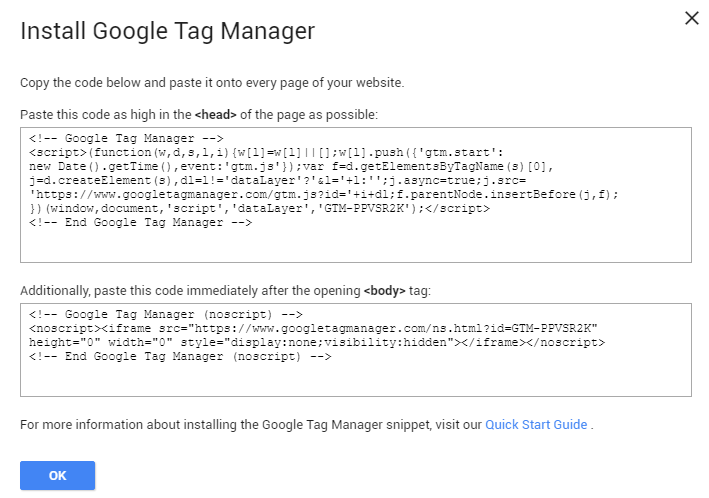
-
Create a Tag

Click the “new tag” button, then select the tag you want to add. As shown above, the Tag manager supports a list of commonly used tags which enable you to track the metrics you want.
-
Add Your Tracking ID
Find your tracking ID. For example – If you want to add your Google Analytics account. You can find your tracking ID in the Google Analytics dashboard.
Copy and paste it into the appropriate box in GTM.

-
Choose What and Where to Track
The most important step is what do you want to track. Say for analytics implementation it will usually be “Page Views”.
This is also considered the crucial step. At this stage, you can also decide where all the tags should fire. Hit the “Create” button.

-
Make Sure Your Site is Ready
Once the Google Tag Manager Code is installed on your site, the next step would be to publish it. If not install the GTM code to your site and you are all set to go.
-
Preview and Publish
This option lets you publish the code immediately or preview it first. Previewing it allows you to check whether the tag is firing.

Finally all set and done. When all the tags are working hit “Publish” the codes will be live. Google Tag Manager will track all the triggers, tags and variables.
Conclusion:
Now that you have implemented GTM, it is easy for you guys to create other tags.
Google Tag Manager dashboard lets you maintain all codes in one database and lets you edit them whenever you need to improve your campaign.